|
|
|
|
|
|
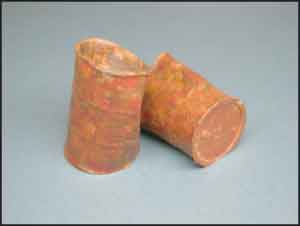
One of our goals as scale modelers is to convince viewers that they are looking at something real. To create this illusion, we first need recognizable objects, which in this case are Scale Equipment Limited’s metal trash cans. Now we need to complete the illusion by adding the correct color and texture that will trick viewers into believing that they are indeed looking at the real thing.
Before beginning this project, take a look at real rust to get an idea of what happens when metal begins to deteriorate. Rust isn’t all one color or texture, and we need to duplicate that mottled appearance to create a convincing illusion. We’re using trash cans, but this technique will work on any Scale Equipment Limited “metal” object.
|
|
|
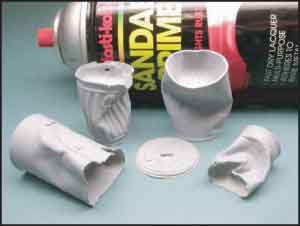
Thoroughly wash all the pieces with soap & water to remove any mold release residue. Some modelers soak resin parts in Westley’s “Bleech Whyte” to get them clean. Use your favorite method. Let all the pieces air-dry, then spray with a good automotive primer like Plasticote “T-235” sandable primer.
|
|
|
|
Rusty metal is mottled and not all one color, so we need to build up the rusty surface in layers. First paint all the “metal” surfaces with a light coat of Floquil “Rust.” Note that the ribbed trash can isn’t in this group. Those types of cans are typically galvanized…we’ll get to that later.
|
|
|
|
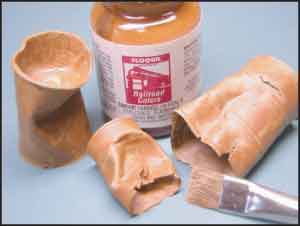
When the “Rust” is dry, dab on some Floquil “Rail Brown” (which is a darker rust color) in splotchy patterns as shown. Don’t cover all the surfaces.
|

|
|
|
The end result should, more or less, look something like this.
|
|
|
|
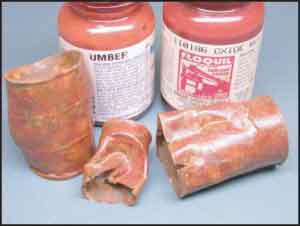
We could leave the rust “undercoat” as-is, but we’re going to go one step further and dab on more touches of color using Floquil “Umber” & “Oxide Red.” You can use other colors as well, but keep them in the reddish-brownish-rustish category. Yes…we really like Floquil colors, which dry to a nice, flat finish.
|
|
|
|
Here’s the finished “rusted metal” basecoat. Remember: DAB on the colors…don’t BRUSH them on, which will leave unrealistic brush strokes. If you choose to leave your weathered metal un-painted, skip the next three steps; however, if you do you’ll miss some really cool stuff.
|
|
|
|
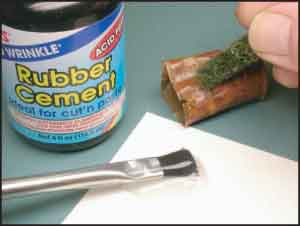
Our next goal is to create peeled paint using rubber cement. Created by Gary Nash & Mic Greenberg, this technique been around for as long as I can remember. Scope a blob of rubber cement onto a filing card and use a small piece of a “Scotch Brite” pad to apply the cement. Dab the rubber cement sparingly onto the metal surfaces. The Scotch Brite pad will result in finer, more realistic rust patterns. Rule-of-Thumb: the more area covered with rubber cement, the less paint on the finished piece.
|
|
|
|
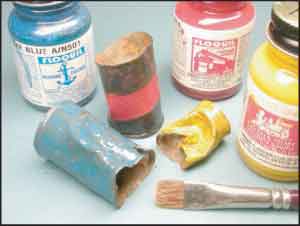
When the rubber cement is dry, paint the surfaces with your choice of color. Paint the entire surface, including the areas covered with rubber cement. You’ll see why in a minute. While the paint is drying, check out more great diorama stuff in your Scale Equipment Limited catalog.
|
|
|
|
Now that the paint is dry, pull off the rubber cement with a piece of tape. I prefer using tape to lift off the rubber cement (as opposed to RUBBING off the cement) because pulling it off creates a nicer surface. Be prepared to use a lot of tape. Each piece will only last for about one or two “pulls.” Removing the rubber cement exposes the rusted surface beneath. This technique creates an effective peeled paint look, but the surface is still just a little too harsh. We need something to tie everything together….
|
|
|
|
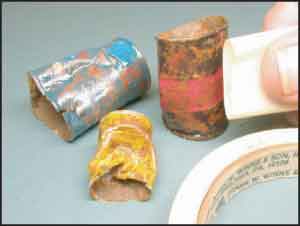
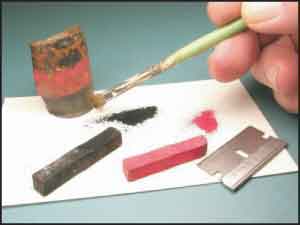
……and here’s just the ticket. This is the key step that tones everything down and creates a less harsh, more realistic piece. The idea is coat the surface with a close CORRESPONDING COLOR of pastel chalk. Scrape a single-edge razor blade across a piece of artist-grade pastel (the kind without any oil in it) to create a pile of dust. Dip a soft brush into the dust pile and lightly brush it on the corresponding surface. In this example, the blue drum is dusted with blue chalk; the yellow drum with yellow chalk, etc. This is worth repeating: “Make sure you match the color of the chalk with the color of the paint.” You’ll be amazed at the look. As a final touch, lightly dust the surfaces with some rust-colored chalk to create a few highlights.
|
|
|
|
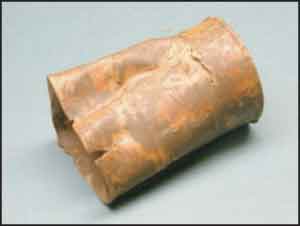
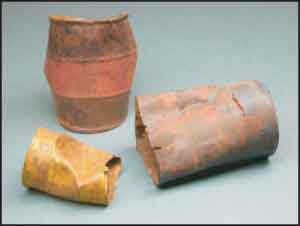
Here’s what the rusted barrels look like after the dust is applied. Although the underlying rusted surface that shows through the paint is VERY subtle, the visual effect is well worth the effort. Viewers will be hard pressed to guess that you aren’t working with real metal!
|
|
|
|
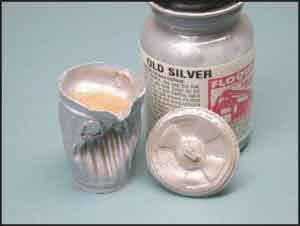
One last note: Remember the galvanized trash can? Well, since galvanized metal doesn’t rust, all you need to do is lightly cover the primered surface with Floquil “Old Silver” and lightly streak on some rust-colored pastel chalk. Instant results!
|
|
|
|